> For the complete documentation index, see [llms.txt](https://help.sentinelsoftware.com/sentinel-help-center/llms.txt). Markdown versions of documentation pages are available by appending `.md` to page URLs; this page is available as [Markdown](https://help.sentinelsoftware.com/sentinel-help-center/settings/access-request-settings.md).
# Access Request Settings
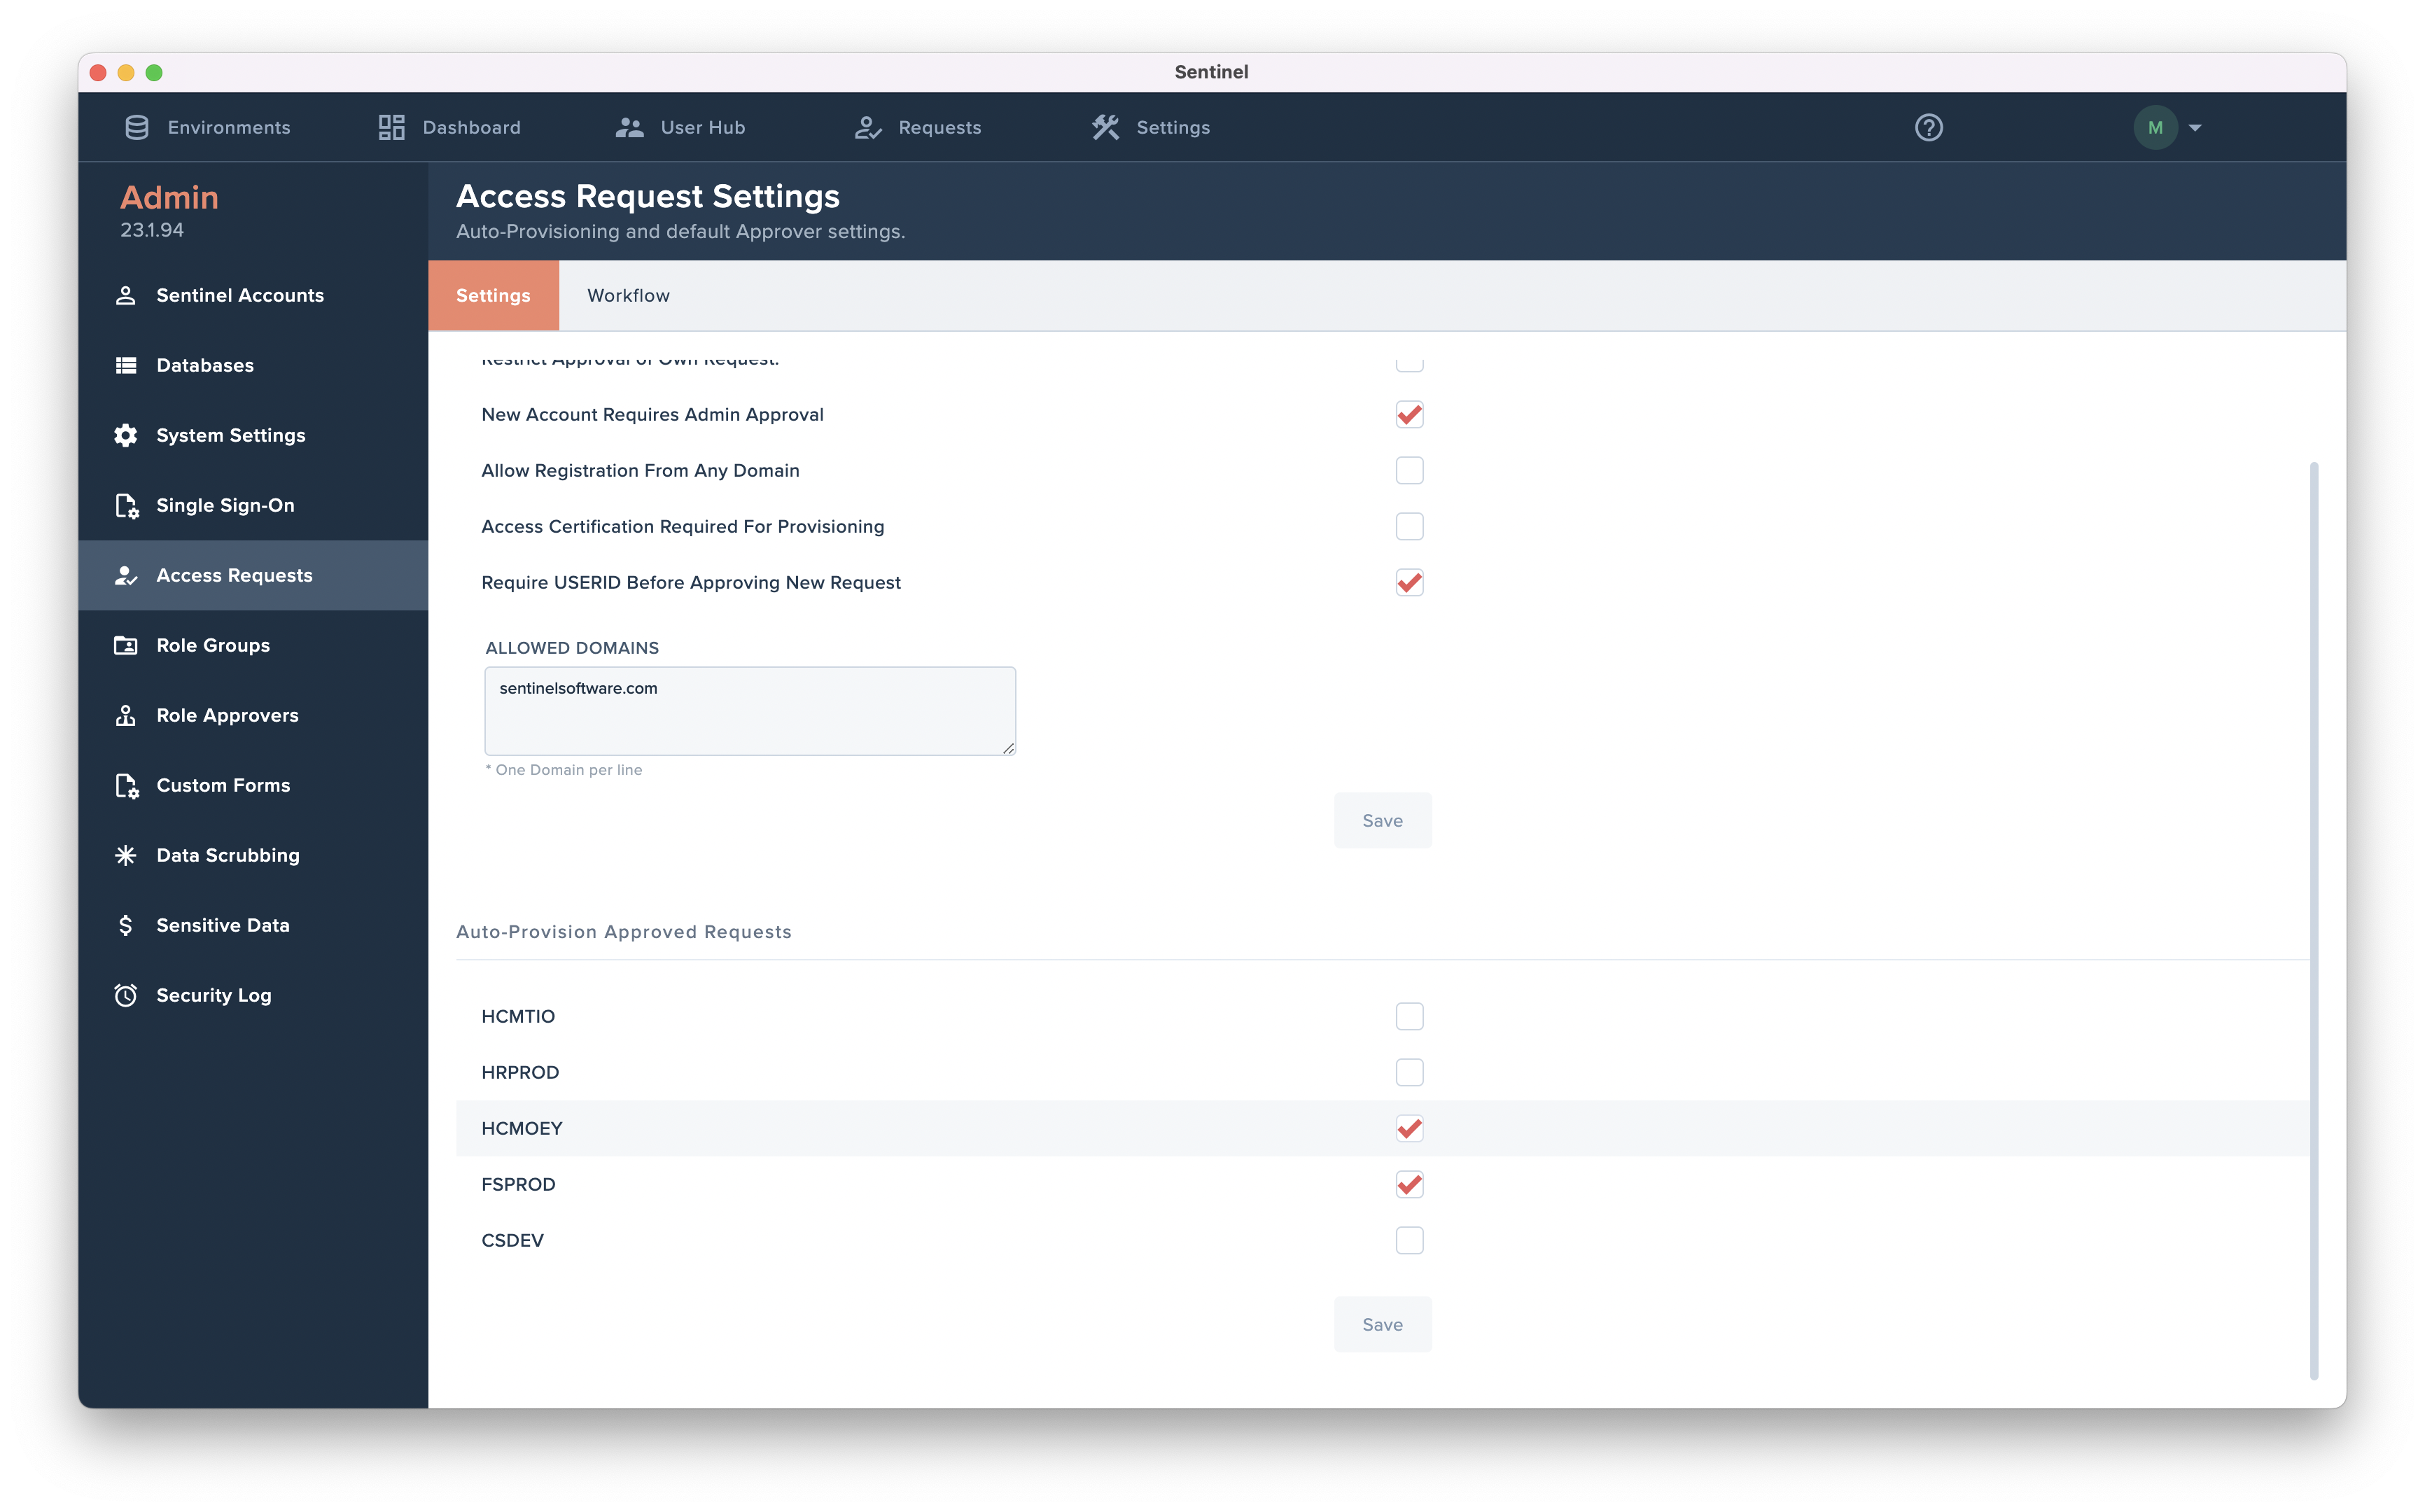
Settings - Access Requests
Access Request Settings are used to configure the Request module settings, manage auto-provisioning, and create automated workflows.
Access Request Module Settings
* **Restrict Approval of Own Request -** Prohibits the approval of a self-created request.
* **New Account Requires Admin Approval -** New user accounts must be approved by admins.
* **Allow Registration From Any Domain -** Allows a new user to register for a Sentinel account from any domain.
* **Access Certification Required For Provisioning -** Certification is required to apply security changes for approved requests.
* **Require USERID Before Approving New Request -** Users must input USERID credentials to approve requests.
* **Allowed Domains -** Specify which domains a new user can register for a new Sentinel account from. e.g., sentinelsoftware.com
{% tabs %}
{% tab title="Settings" %}
Auto-provisioning automatically applies security changes in PeopleSoft for approved requests. \**Applied changes are recorded with 'SENTINEL\_AR\_AUTO' in the Updated By field of the history log.*
#### Enable Auto-Provisioning:
1. Navigate to **Settings - Access Requests.**
2. Under the **'Settings'** tab, scroll to the **Auto-Provisioning** section.
3. Check the box of any environment to enable auto-provisioning.
4. Save changes.
{% endtab %}
{% tab title="Workflows" %}
Automated workflows provide a streamlined, accurate way to route requests. Once a request is created, the intended recipients automatically appear in the designated fields.
#### **EXAMPLE**
When a request is created for an employee in **Department 4200**, **Business Unit PSUNV,** and **Company GBI**, the **Reviewer** will default to **Biv** and the **Approver** to **Iurii**.

#### Create Workflows:
1. Navigate to **Settings - Access Requests.**
2. Under the **'Workflows'** tab, click **'Add'** at the top right.
3. Select the **System Type.** (HR, FS, CS)
4. Select one or more attributes for **Job Criteria.** (Position, Job code, Department, Location, Business Unit, Company, or Region)
5. Select **Approvers.** (Reviewer, Approver, Backup Approver, Notify)
6. Click **'Create.'**
{% endtab %}
{% endtabs %}